Introduction Installing the Springer Dogs Exerciser
Installing the Springer Dogs Exerciser can seem daunting, especially if it’s your first time working with a bike attachment for your dog. However, once you understand the simple steps involved, you’ll realize it’s quite manageable. In this guide, we’ll walk you through the entire installation process while providing tips for a secure and safe setup. Whether you are a beginner or experienced cyclist, you’ll find this guide extremely helpful for your dog’s exercise needs.
Why Installing the Springer Dogs Exerciser Can Seem Daunting
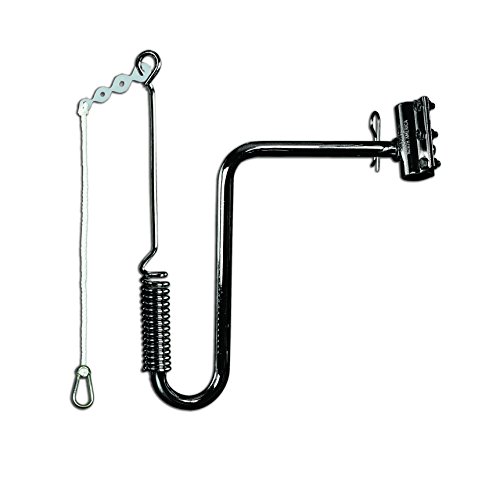
At first glance, the components of the Springer Dogs Exerciser may appear complex. The package includes several parts: the arm, clamp, spring mechanism, bolts, and safety release system. Additionally, the safety of your dog is paramount, making the correct installation even more critical. According to Springer America, proper setup ensures the exerciser works as intended, keeping both the rider and dog safe during bike rides.
Fortunately, detailed instructions and reliable resources are available to assist you. Taking it step-by-step reduces the overwhelming feeling that often accompanies new installations.

Tools You Will Need
Before you begin, gather a few tools:
- Adjustable wrench
- Screwdriver
- Allen wrench (often included)
- Measuring tape
Preparing your tools beforehand ensures a smoother, less stressful installation process.
Step 1: Read the Manual Carefully
Installing the Springer Dogs Exerciser can seem daunting if you skip the manual. Many installation issues stem from not thoroughly reading the provided instructions. Springer America’s official website (springeramerica.leaddyno.com) emphasizes the importance of this step.
Moreover, reading the manual helps you familiarize yourself with each part. Transitioning from confusion to clarity begins with understanding the product inside and out.
Step 2: Choose the Right Bike
Not every bike is compatible with the Springer Dogs Exerciser. Standard bikes with tubular frames are best. Mountain bikes and city bikes usually work well. However, carbon fiber or very small frames may not support the clamp securely.
For more information about choosing a compatible bike, you can check guidelines from the National Park Service (.gov) which discuss general bike safety for outdoor activities.
Step 3: Attach the Clamp
Now, it’s time for action.
- Locate the seat post or frame area specified in the manual.
- Attach the clamp tightly using the provided bolts.
- Use your adjustable wrench to secure it firmly.
Installing the Springer Dogs Exerciser can seem daunting mainly because the clamp must be very tight to ensure safety. A loose clamp may cause instability, risking injury to you or your dog.
Additionally, many users recommend double-checking the clamp after a short trial ride.
Step 4: Install the Spring Mechanism
The spring is what gives the Springer its shock-absorbing quality. Here’s how to install it:
- Insert the spring inside the main arm of the exerciser.
- Secure it with the bolts and screws provided.
Make sure the spring moves freely within the arm without obstruction. According to safety studies from Centers for Disease Control and Prevention (.gov), minimizing sudden jerks or pulls is vital in preventing accidents, and the spring plays a major role in this.
Step 5: Attach the Leash and Safety Release
The Springer comes with a special safety release mechanism designed to detach your dog if they suddenly bolt. Installing the Springer Dogs Exerciser can seem daunting if you do not understand how the safety release functions. However, it’s fairly straightforward:
- Attach the special leash to your dog’s harness, not their collar.
- Thread the leash through the clamp and arm as per the instructions.
- Engage the safety release clip correctly.
Always test the release mechanism before taking your dog on a real ride.
Step 6: Test the Setup
Before hitting the road, conduct a dry run:
- Walk your bike while your dog is attached to the Springer.
- Observe how the spring absorbs pulling or tugging motions.
- Check for any loosening of bolts or odd movements.
Testing your installation thoroughly is critical. As noted by American Veterinary Medical Association (.org), sudden movements without proper restraint can lead to injuries.
Common Mistakes to Avoid
Installing the Springer Dogs Exerciser can seem daunting due to common mistakes. Let’s look at a few:
- Skipping the safety release: Never omit the safety mechanism.
- Incorrect frame choice: Choosing a non-compatible bike can result in unsafe setups.
- Using a collar instead of a harness: Always use a harness to avoid neck injuries.
- Loose bolts: Tighten all bolts securely but do not over-tighten to avoid damaging your bike frame.
Avoiding these mistakes ensures that your bike rides with your dog are safe and enjoyable.
Tips for a Successful First Ride
Once installation is complete, you might feel a bit anxious. That’s normal! Here are some tips:
- Start with a short, slow ride in a quiet area.
- Bring water for your dog.
- Monitor your dog’s behavior closely.
- Reward your dog with treats to create positive associations.
Also, remember that your dog may need a few sessions to adjust to running alongside a bike.
Recommended Installing the Springer Dogs Exerciser can seem daunting
If you’re looking for additional accessories, here are some trusted options available on Amazon.com:
- Springer Dog Exerciser Replacement Parts Kit
- Dog Harnesses for Biking
- Reflective Gear for Night Rides
Selecting high-quality accessories can make the entire experience more pleasant for both you and your furry companion.
Why Proper Installation Matters
Correct installation isn’t just about convenience. It directly impacts your dog’s safety and your control while riding. According to the American Society for the Prevention of Cruelty to Animals (.org), exercise with proper safety measures enhances your dog’s physical and mental well-being.
Additionally, a properly installed Springer Dogs Exerciser ensures your dog runs at a safe distance from the wheels, reducing the chance of accidents.
Conclusion: Installing the Springer Dogs Exerciser can seem daunting
Installing the Springer Dogs Exerciser can seem daunting initially. However, by following each step carefully, reading the manual thoroughly, and double-checking your work, the process becomes much more manageable. Remember, investing time and effort into a proper setup guarantees safe, enjoyable rides for both you and your best friend.
Take it slow, practice patience, and soon you’ll be enjoying countless adventures with your dog by your side!🚴♂️🐶✨